
In Dynamics 365 Marketing things happen so fast that it can be hard to keep track of every new feature. Since April ’23 you have had the ability to customise columns shown in a real-time journey, so all the tagging and connecting to campaigns you’ve always wanted to do, is now possible.
Let’s go through how you can customise the journey and what limitations there are.
Editing the journey requires access to the maker experience in Power Platform as this is editing the form the journey builder uses. You will have to add columns in Dataverse and do changes to the form shown in the model-driven Power App.
Open https://make.powerapps.com/ and navigate to your solution (absolutely every change you do in configuration should always, always be in a solution.) Normally I put all changes in one solution and change the version when I do changes to move it from test to production).
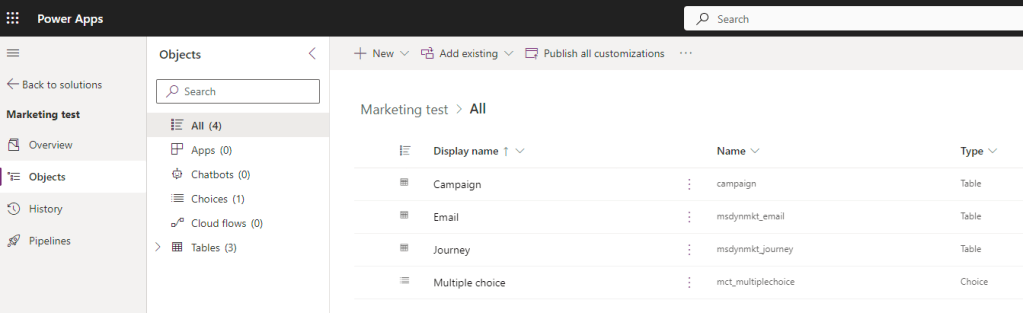
As you can see in the screenshot, I’ve added the Journey (by clicking “Add existing” and adding the existing table Journey). To make sure you have the correct Journey, make sure this is the info:
- Display name – Journey
- Name – msdnmkt_journey
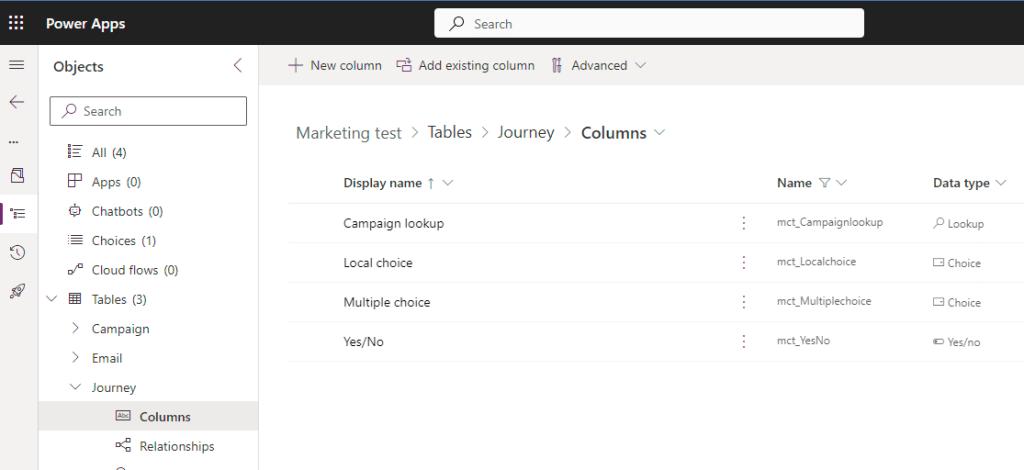
You then open the Journey and add your columns to the table. This can be existing columns or you can create your own columns. As you can see in the screenshot below, I’ve added four different columns in different data types.
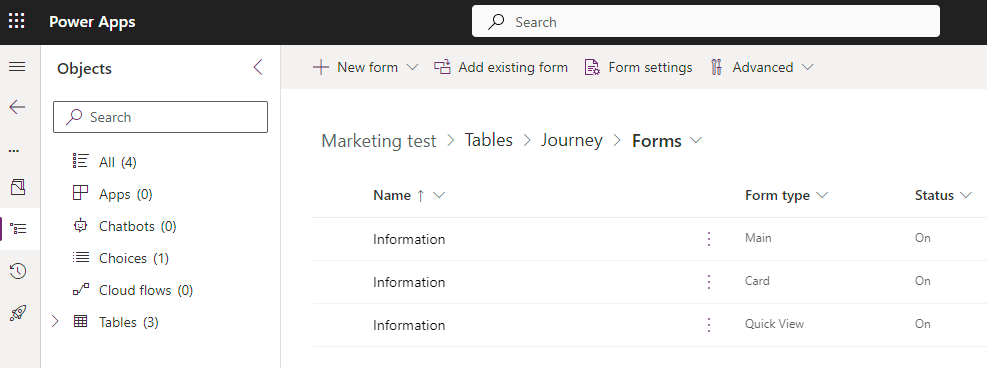
When you’re finished adding all the columns you need, you find the correct form for the table. The one used in the marketing app has the name “Information” and the Form type “Main”.
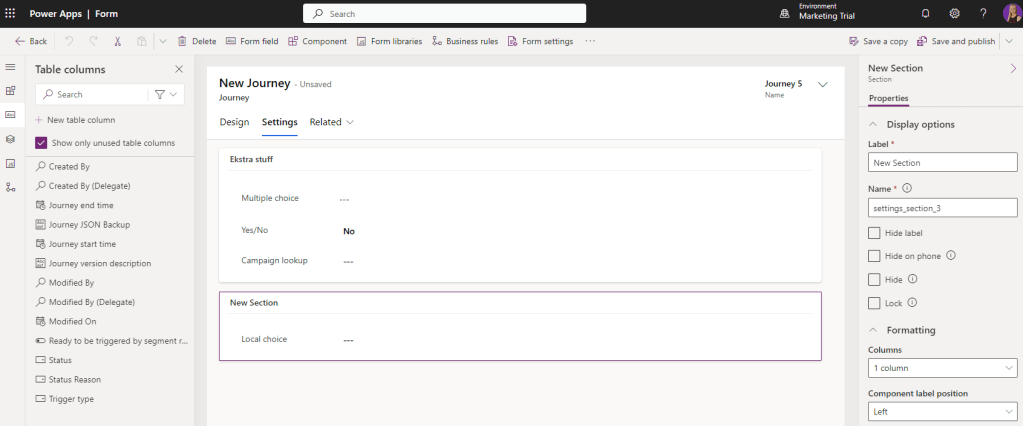
When you click on the form, the form editor opens and you can add your columns to the form. For the columns to show in the journey they have to be added to the settings tab. That’s the only place you can add columns. You cannot create a new tab, and you cannot add it anywhere else.
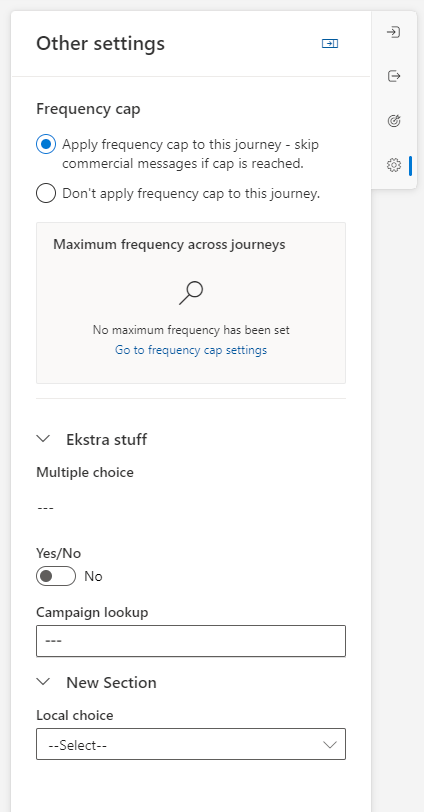
As you can see in the screenshot below, I’ve added my four custom columns in the settings tab, in two different sections.
Remember to save and publish!
Now I can open the marketing app and open a real-time journey to see my changes.
In the settings area to the far right I can find the changes.
Under the Frequency cap section (which I cannot see in the editor of the form), I have my two new sections and four new columns added.
I can now categorise and add my campaigns to my journeys.
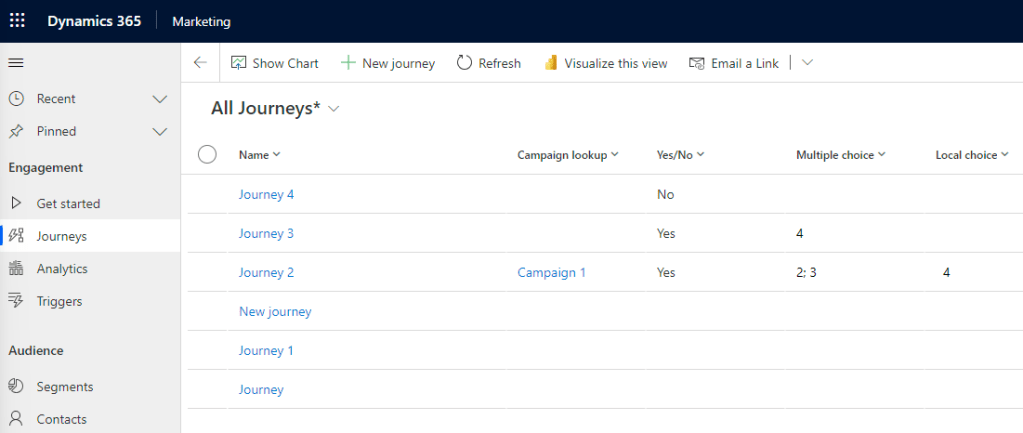
I should also edit the journey views to add the new columns I’ve added, to get even better control over all the journeys in my system.
I hope you have found new ways of making sure your journeys are configured and categorised the way you want. Maybe you want to add a column for events to your journey, or maybe you want to connect journeys together. There are many ways this can be beneficial for you and your marketing needs.
As of July ’23, you can only do this with journeys, not with emails.

1 thought on “Customise a journey in RTM”